Homemade Instant Pot Coconut Yogurt Recipe (Keto)
An easy, foolproof recipe for Homemade Coconut Yogurt. With just 3 simple ingredients and an Instant Pot, you’ll have delicious homemade yogurt in no time!

Table of Contents
What Makes This Recipe Great
Did you know you can make your own plant-based yogurt at home for a fraction of the price? With grocery prices skyrocketing, I promise you, making your own is worth it. Plant-based yogurts are so pricey, and the process of making them at home is not nearly as scary as you might think!
Enter, Instant Pot Coconut Yogurt, an easy, budget-friendly recipe that you’ll want to keep making over and over! You don’t need a fancy yogurt maker, just an Instant Pot, canned coconut milk, probiotic capsules, and agar agar flakes.
This keto-friendly yogurt is made right in your home kitchen for a fraction of the price! It’s versatile and perfect for breakfast, snack, or dessert. Switch up your toppings or eat it plain, this homemade coconut milk yogurt recipe will wow you Every. Single. Time!
Recipe Highlights
- Keto & Low-Carb
- Easy Prep
- No added sugar, super creamy texture, just like your favorite tangy yogurt!
- Active cultures from Probiotic supplement! Great for gut health!
- 3 Ingredients
- Less expensive than store-bought yogurt
- This Dairy-free yogurt is also Gluten-free, Grain-free, Paleo, Whole30, Plant-based, Vegetarian, and Vegan.
- It’s versatile! Switch up the milk, add toppings, and more!
Watch The Recipe Video
Note: You can also watch this recipe video on YouTube.
Ingredient Notes
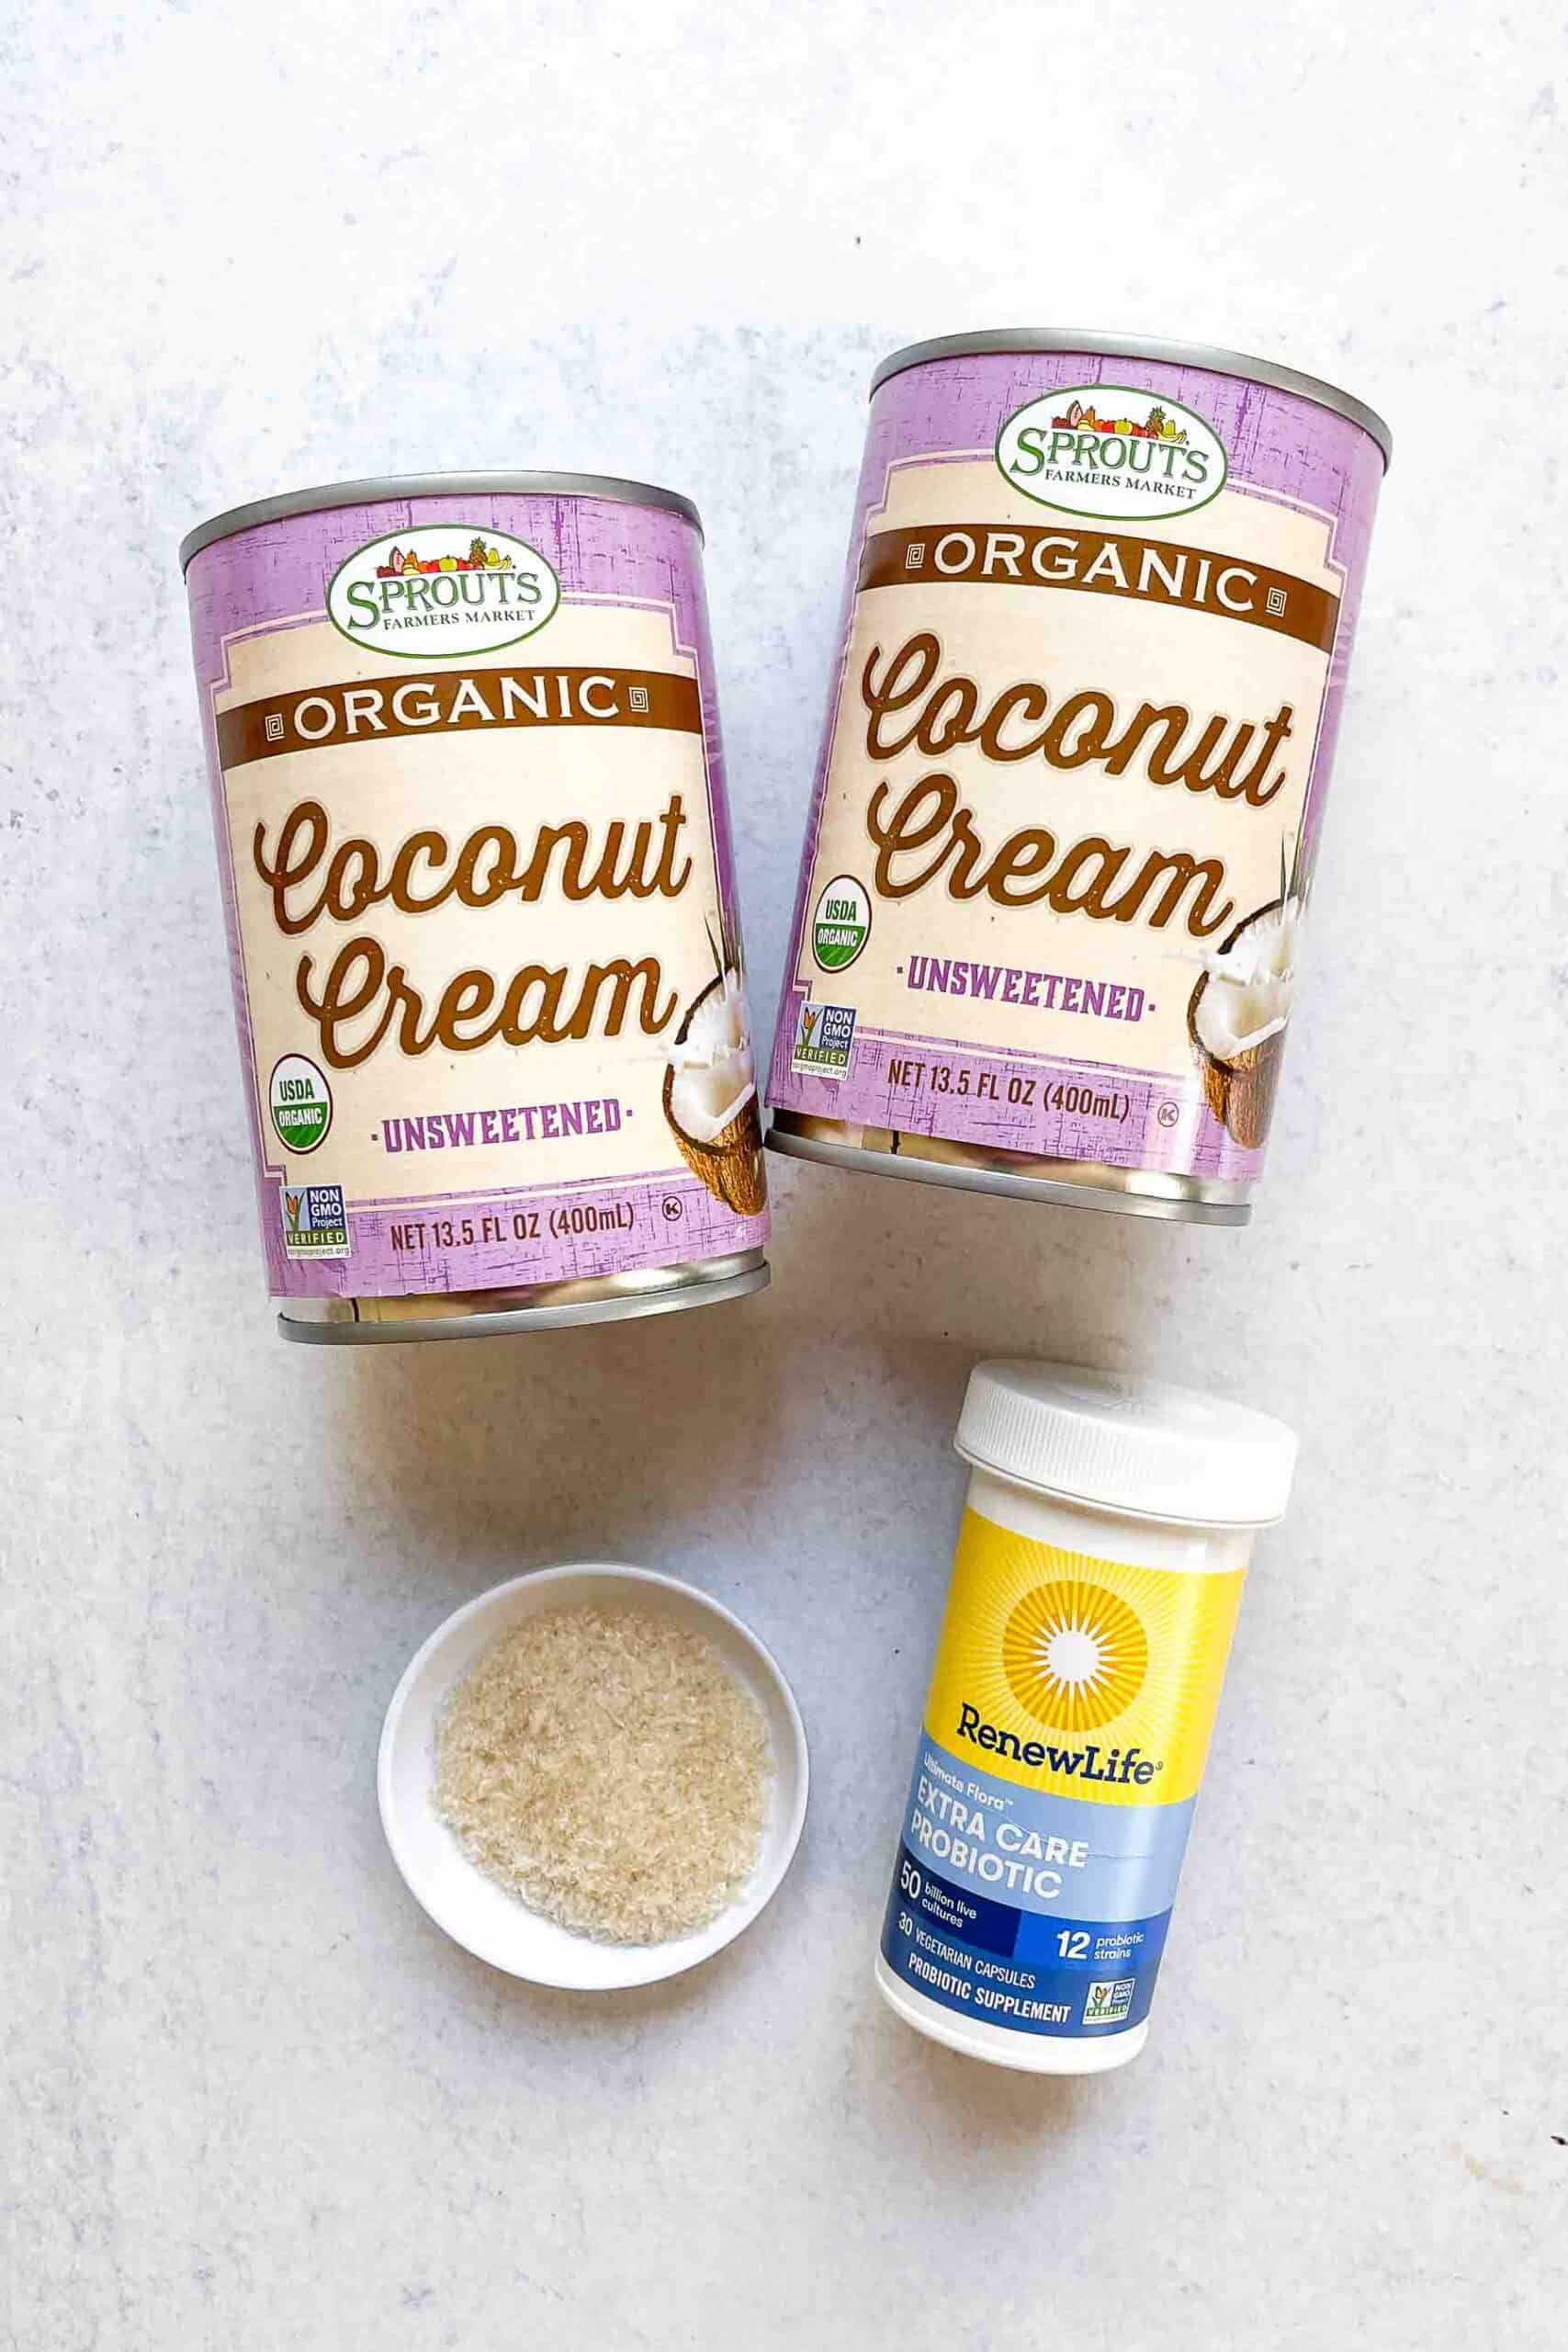
- Canned coconut cream: This is my preference for the best fat macros. Coconut cream has a higher fat ratio than coconut milk. My go-to is the organic generic Sprouts brand. It has a really great price. I also used the Whole Foods 365 canned coconut cream and loved it. Same with the Thrive Market brand and Thai Kitchen brands. You can also use a can of full-fat coconut milk if desired. Choose your favorite brand of coconut milk.
- Agar Agar Flakes: This is a gelatin made from seaweed (so vegan friendly!), and the best of all the thickeners I tried. It thickened the coconut milk yogurt perfectly and left it silky, smooth, and lump-free. Tapioca starch and arrowroot flour left it too gritty. I do not recommend substituting any other thickener for the best results. You can find the exact version I used here. Note: Do not use agar agar powder. Only agar agar flakes will work.
- Probiotic Capsules: It is very important that you are getting CAPSULES that you can open and easily pour in the probiotic powder inside. You do not want probiotic pills, since you would have to crush those up and it would be too much of a hassle. I used these exact probiotic capsules that I got off Amazon and they worked great! They have 50 billion live cultures. I also used the Sprouts generic brand that was in the refrigerated section of vitamins, it was also 50 billion live cultures and worked great too!
- Note: The daily probiotic I take is Seed (code TASTESLOVELY for 15% off), which is THE best probiotic on the market since it is the only one that delivers probiotics all the way to your colon. But, it is on the pricier side, so I like keeping Seed as my supplement and using a more cost-effective probiotic for this keto yogurt.
Step-by-Step Instructions
- Set your Instant Pot to SAUTE. Add in the 2 cans of coconut cream and wait for them to come to a rolling boil uncovered (no need for the lid). This takes about 3-5 minutes.
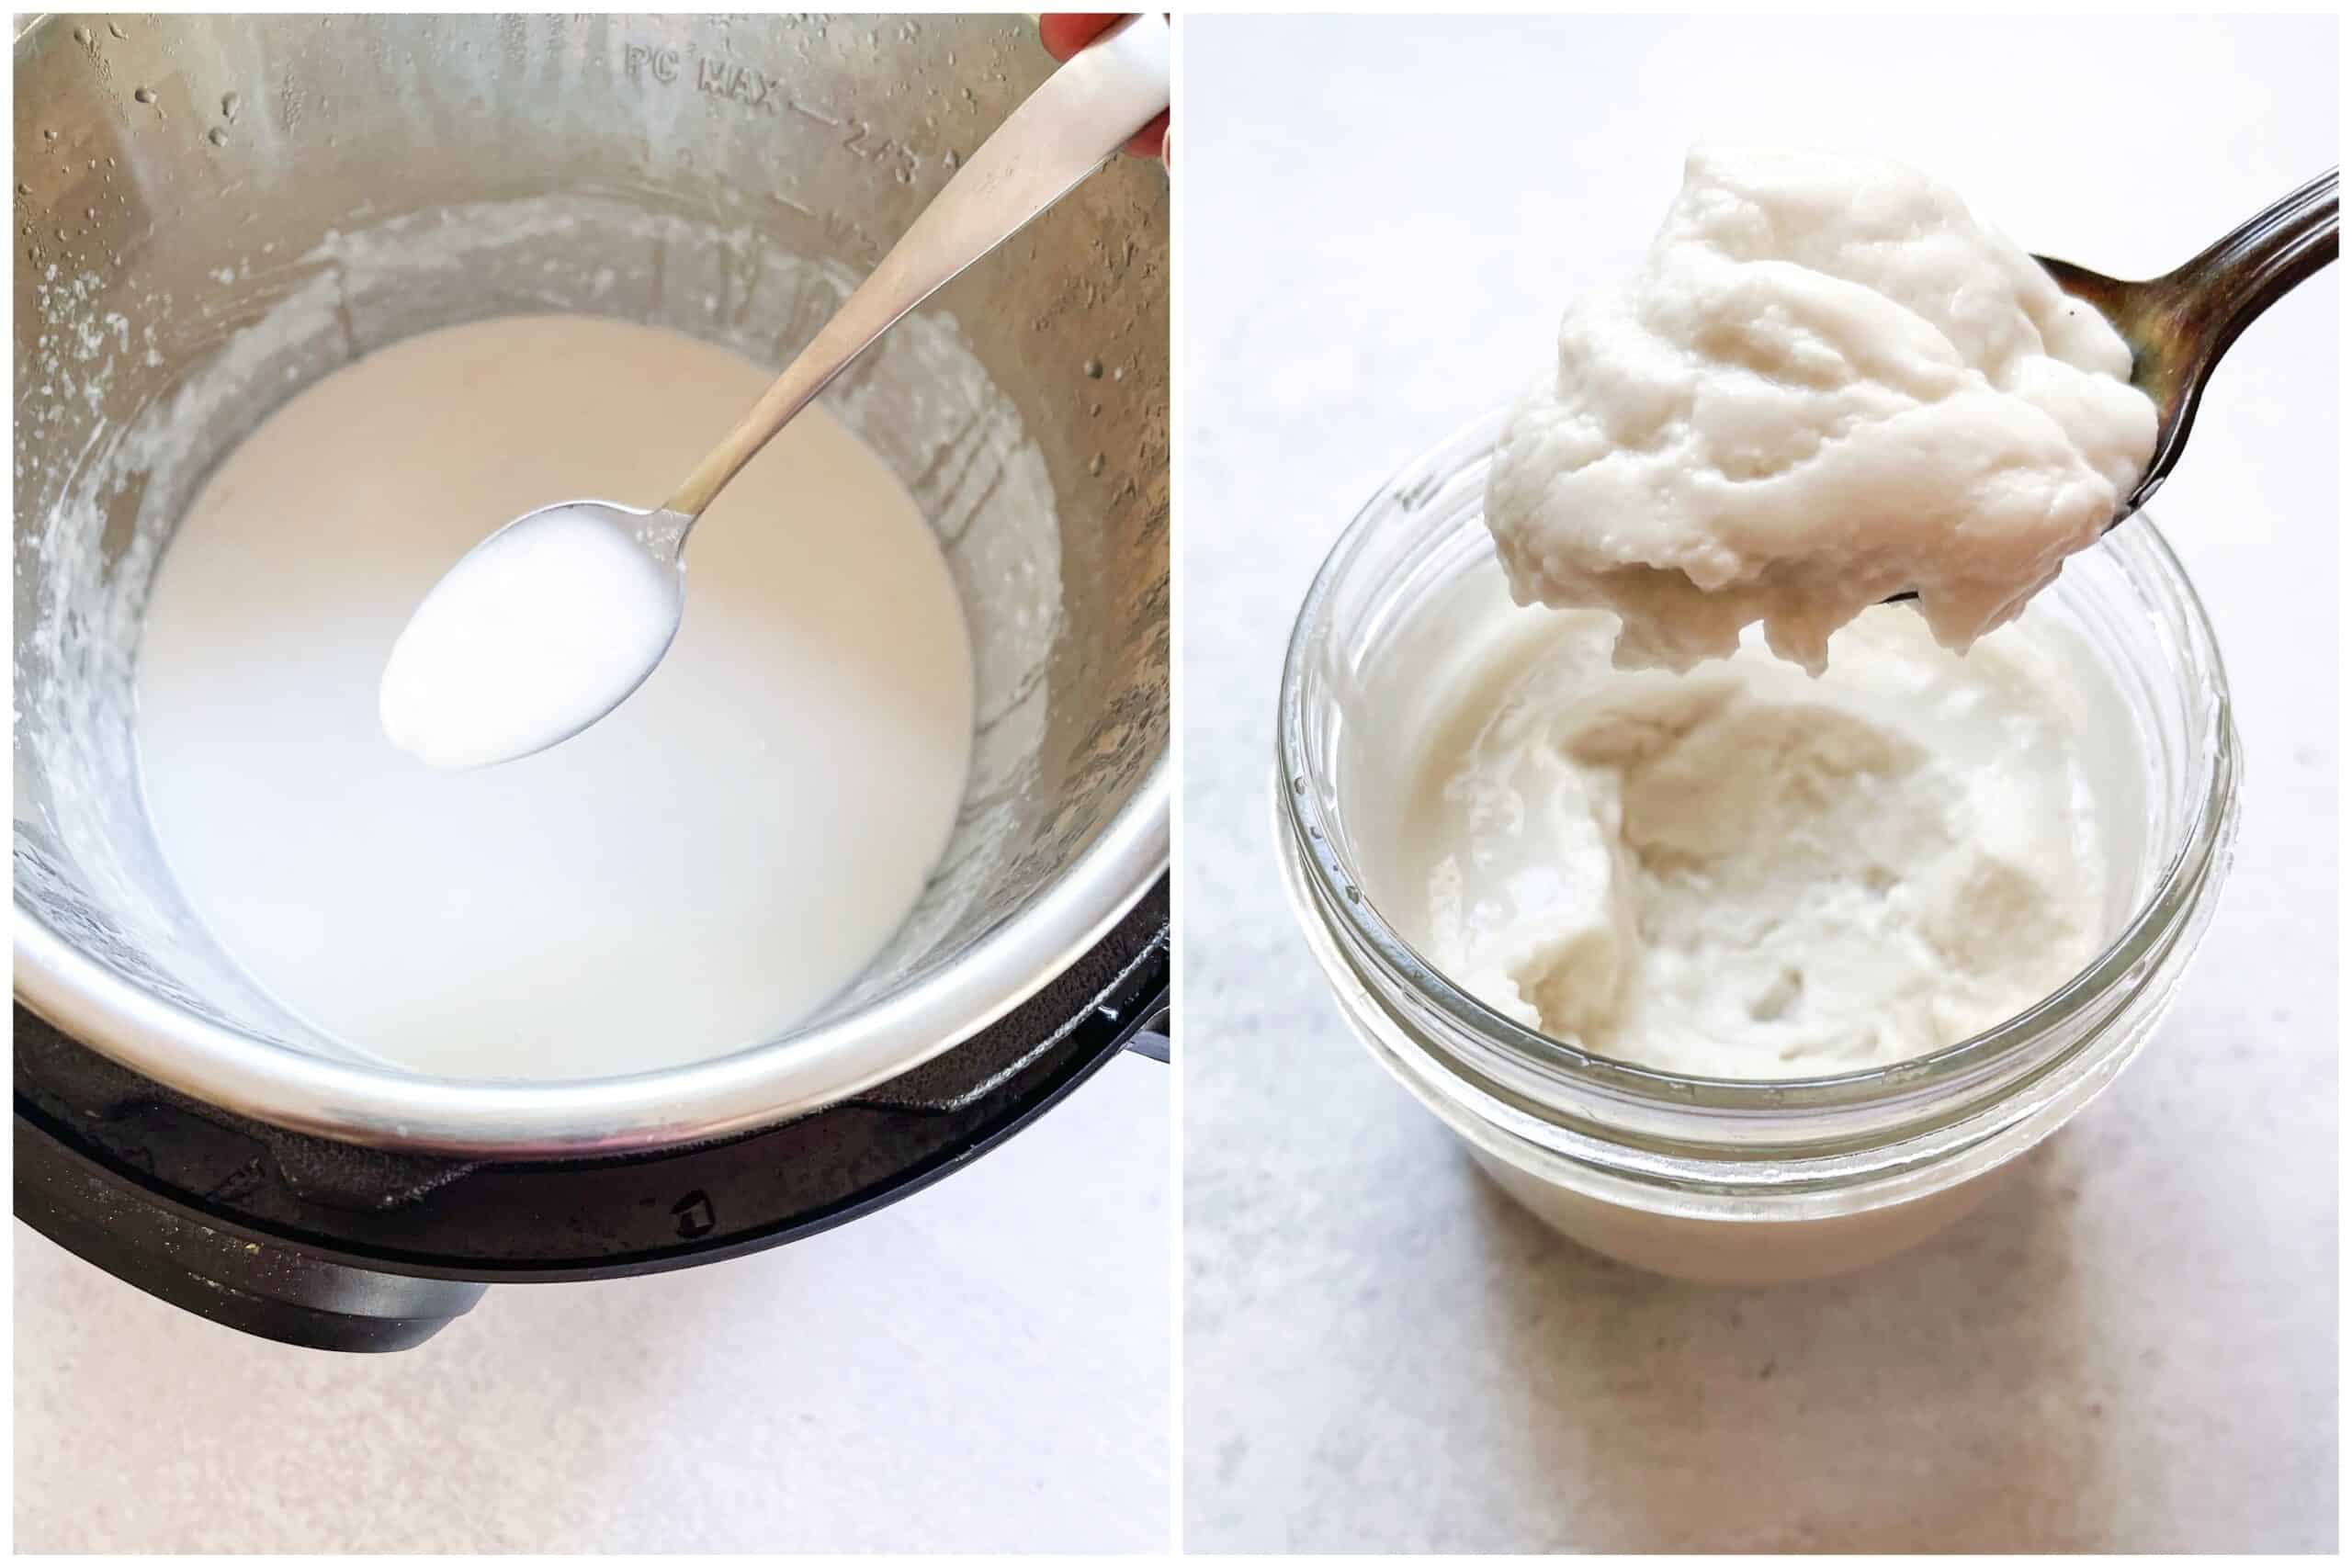
- Once boiling, press CANCEL on your instant pot. Add in the agar agar flakes and whisk vigorously to combine.
- Let the mixture cool to 110ºF using an instant-read thermometer. If you don’t have an instant-read thermometer, you want the mixture warm enough to touch without it burning you. If it is too hot, it will kill the bacteria in the probiotic capsule. I set a timer for 30 minutes, which is how long it usually takes for it to cool enough.
- Once cooled to 110ºF, open the 4 probiotic capsules and pour them into the coconut cream mixture in the instant pot. The coconut cream will already be slightly thickened from the agar agar flakes. Whisk again to fully combine the probiotic capsule powder.
- Close your Instant Pot and press the YOGURT button. You may need to press it a few times until it says 24:00, meaning 24 hours. The yogurt is going to take between 18-24 hours. I like to set it for 24 hours so I have a long window to get the coconut yogurt the next day.
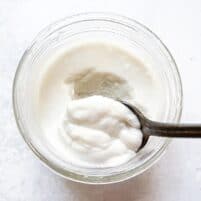
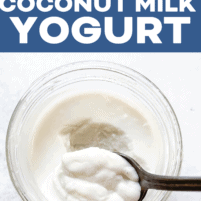
- Somewhere between 18-24 hours, your coconut yogurt is done! Open the lid, and transfer the yogurt to jars or air-tight containers to cool. The keto yogurt will still be on the liquidy side. Coconut milk yogurt firms up *significantly* after cooling in the fridge, so don’t panic that it’s not “yogurt thick” in the warm stage. If it tastes like it has that yogurt tang, you’ve made yogurt!
Expert Tips
- Milk Alternative: You could also use any dairy-free (or dairy!) milk! I tried this with almond milk, soy milk, and cashew milk, and it works but I don’t love the flavor. Coconut milk has its own natural sweetness and just the right amount of tanginess for me. Let me know in the comments if you make this vegan yogurt with different milk and love how it turns out! Or make multiple and do a taste test!
- Thickener: 1 tablespoon was my preferred amount for a coconut yogurt that has a thickness right in between Greek yogurt and regular dairy yogurt. If you want it thicker, use a little bit more agar agar flakes. Maybe 1.5 or 2 tablespoons. If you want it thinner like a kefir yogurt, use less. Maybe 1/2 a tablespoon. Have fun playing around with it and finding the perfect ratio to find the thickness that suits your preference.
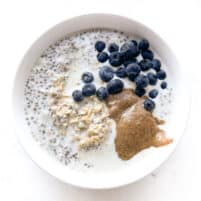
- Flavored Yogurt: I love this coconut yogurt plain, so it is the most versatile for whatever I need it for. (I use this in place of sour cream!) But if you like flavored yogurt, feel free to puree strawberries, blueberries, raspberries, etc., fold it in, and then chill in the fridge. I would think 1/2 a cup of pureed fruit would work great. You can also add in maple syrup or organic cane sugar for added sweetness, though this is not keto-friendly. Use monkfruit sweetener if you’re keto.
- Doubling the Recipe: You can easily double (or triple!) this keto yogurt recipe if you need to make a big batch. Especially great if you have freezer space.
- Instant Pot Yogurt Function: I’ve learned that every instant pot has different yogurt functions. This is the exact instant pot that I used when testing this recipe and shown in the recipe video. It just has me press YOGURT and offers either BOIL (I skip this and use the SAUTE button instead) 18 hours or 24 hours. Others have reported that their instant pot starts the sequence with BOIL, then cools the mixture, then beeps when it’s time to add the probiotic capsules, etc. Please read the manual for your instant pot to familiarize yourself with its YOGURT function.
- Instant Pot Duo/Pro Crisp: If you have a newer Instant Pot, like the Instant Pot Duo Crisp or Pro Crisp, it does not have a yogurt function. Instead, per reader experience, use the Sous Vide function at 110 degrees for about 18+ hours. The coconut milk yogurt will then thicken in the refrigerator.
Serving Tips
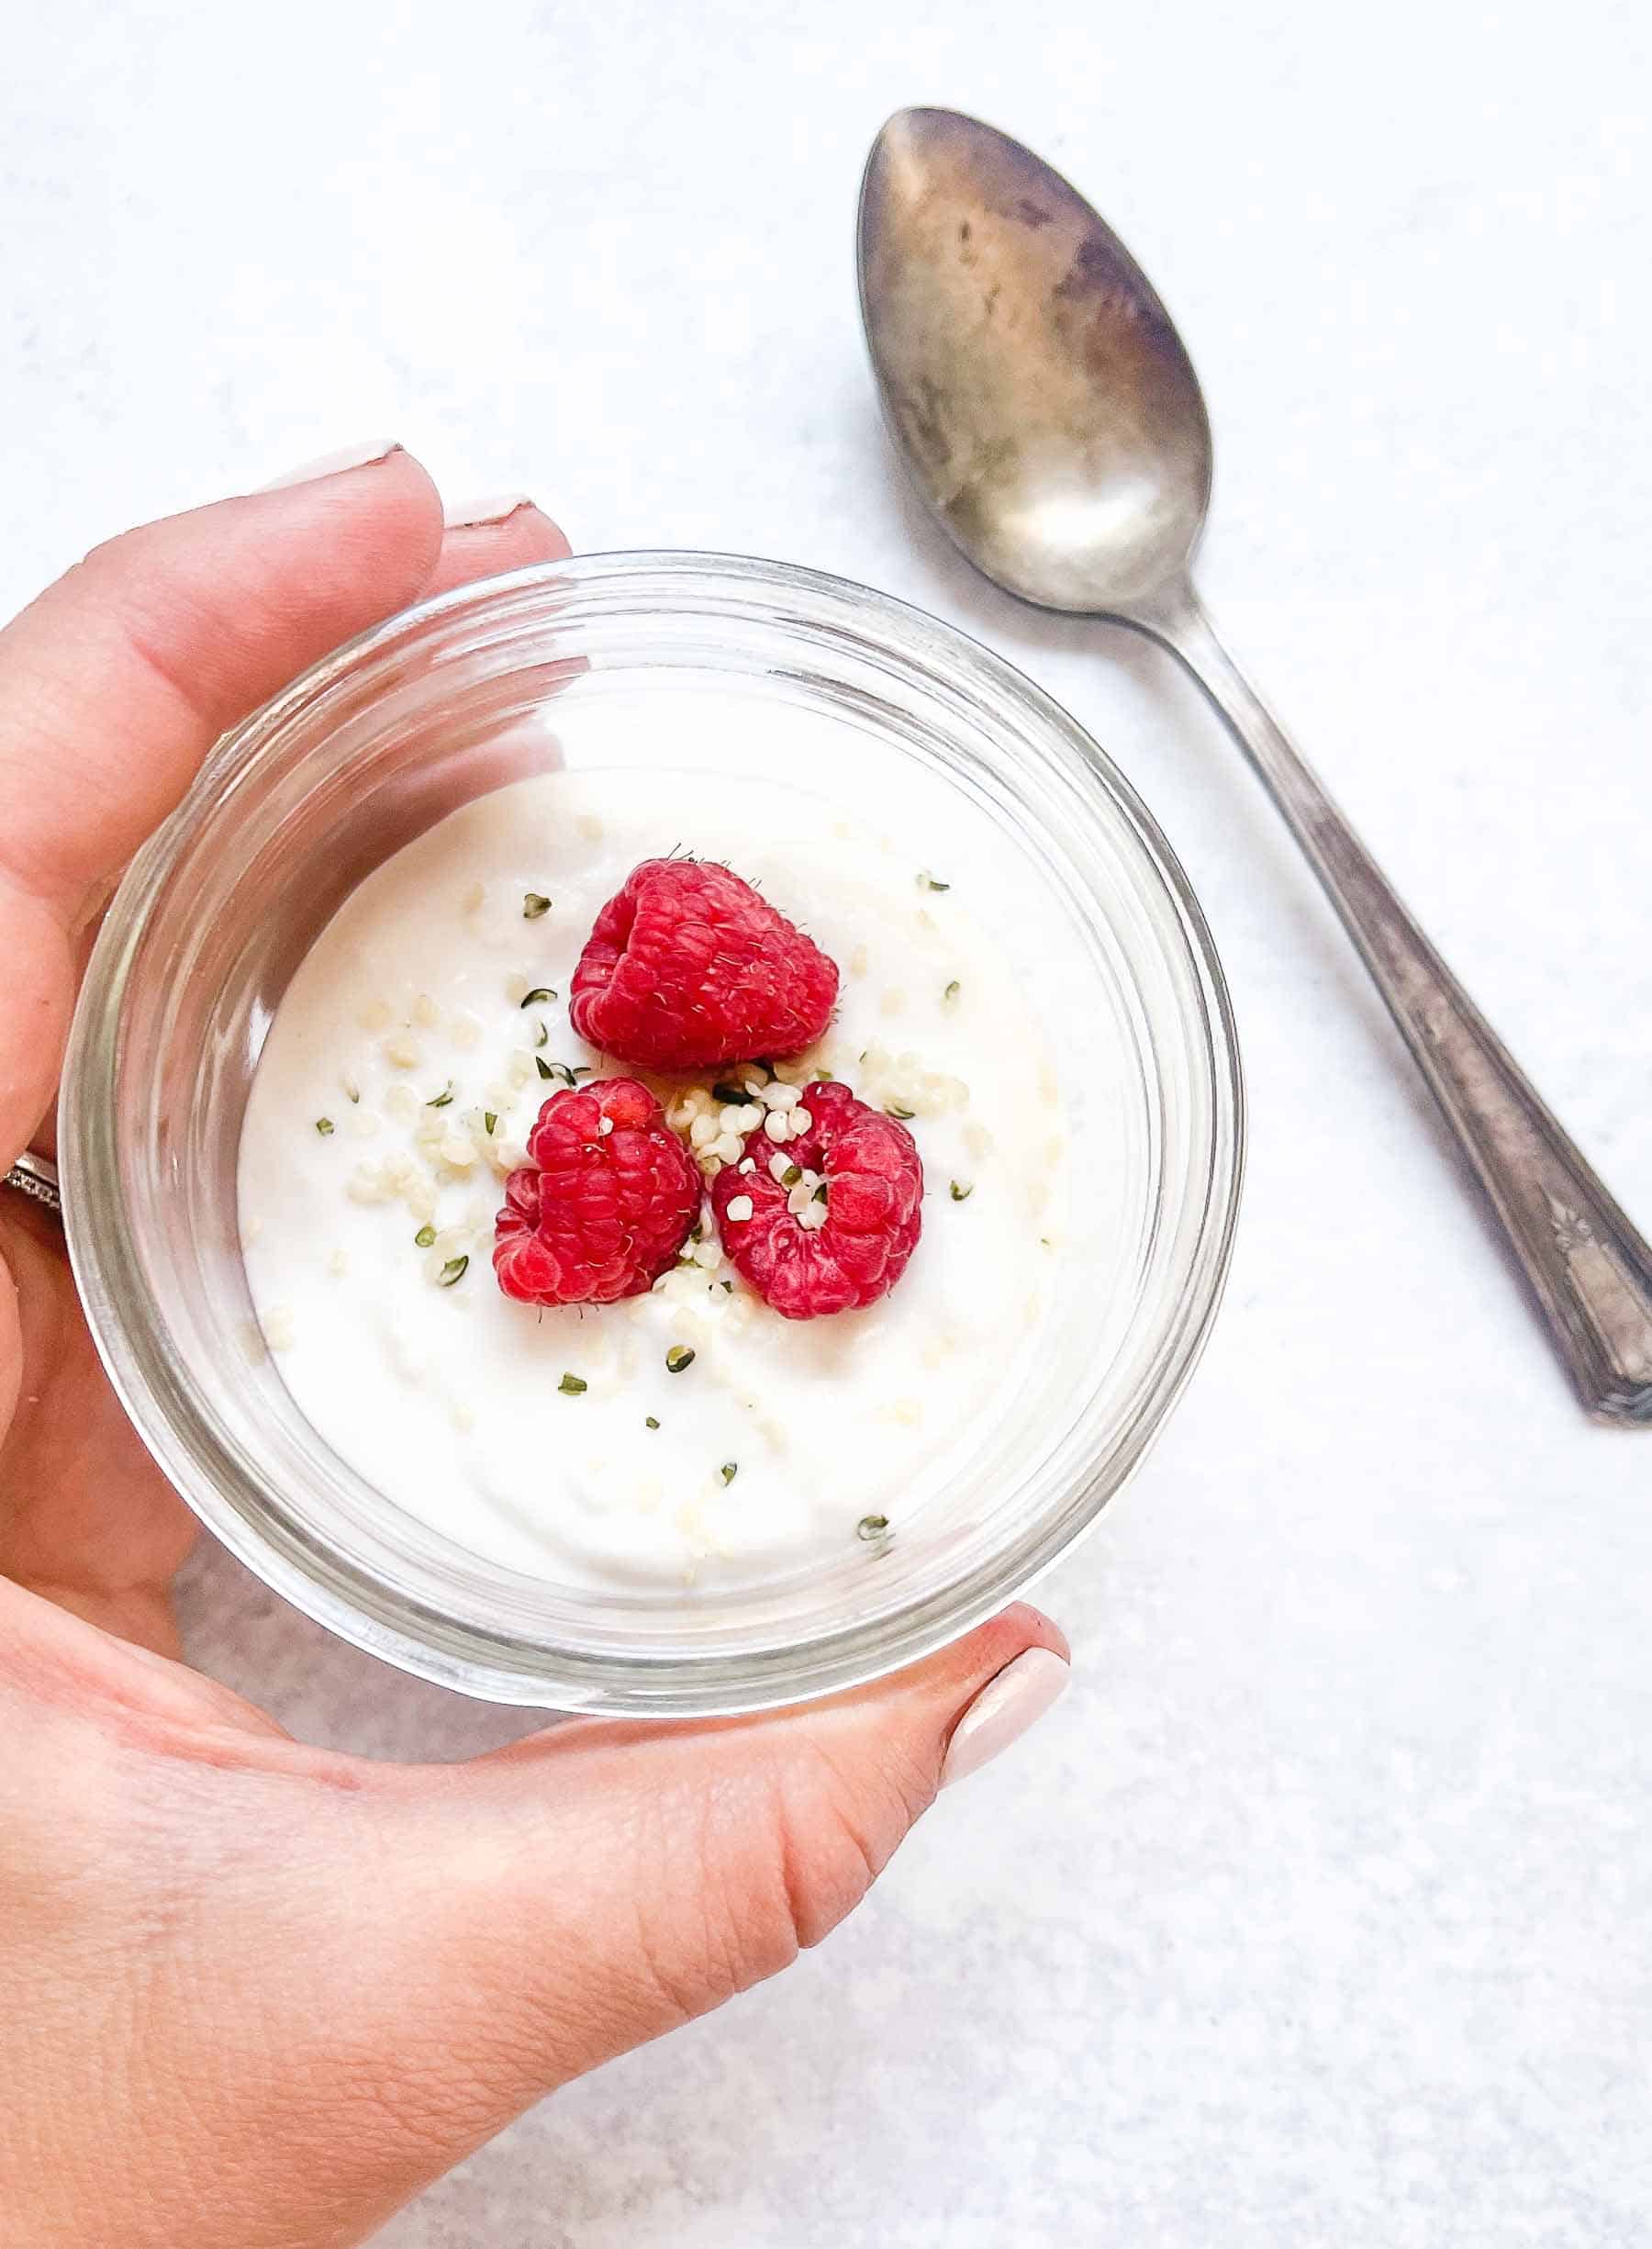
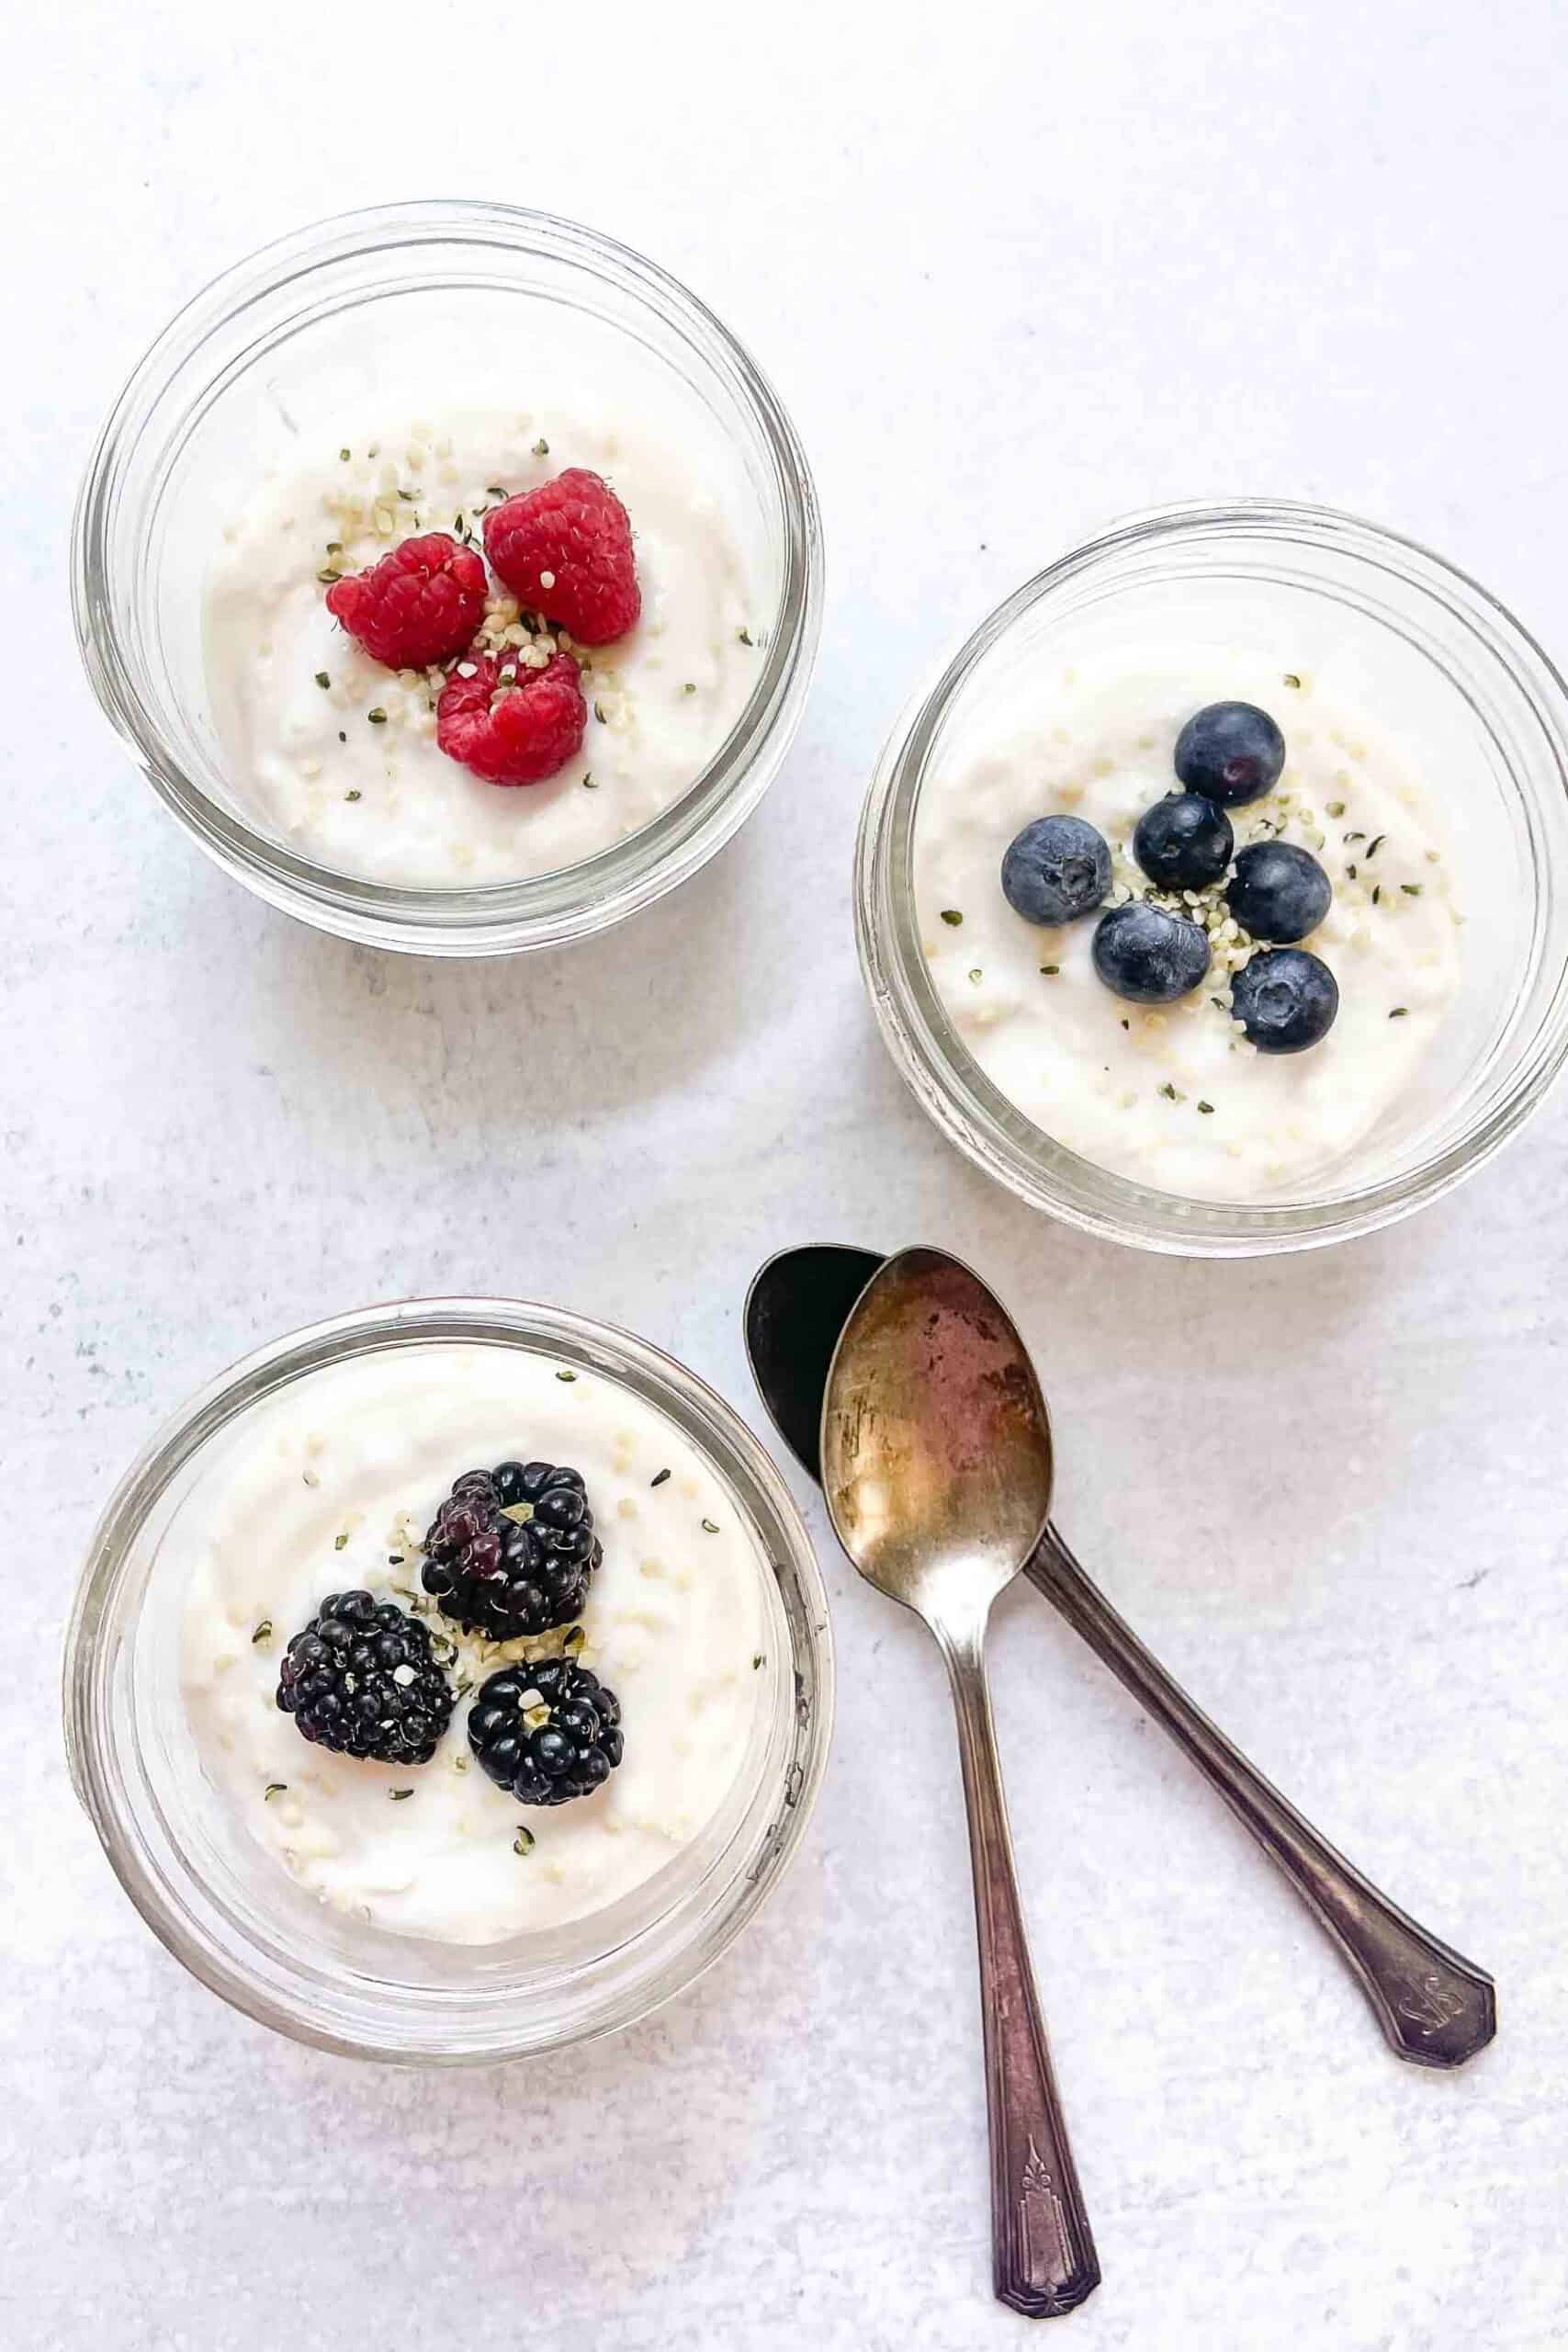
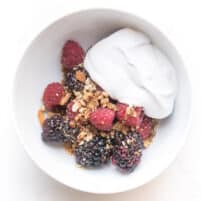
I like to transfer the coconut yogurt to half-pint mason jars or 4-ounce mason jars (freezer-friendly!), then let them cool completely in the refrigerator. However, any airtight container or glass jar will work.
Top your yogurt with granola, fresh fruit, peanut butter, and other keto-friendly or regular toppings you desire!
Storage Tips
Store in an airtight container or mason jar in the refrigerator for up to 30 days, if not longer. Just check for spoilage (mold, discoloration, bad odors).
You can freeze this yogurt in any freezer-safe container! It will last in the freezer for up to 1 year. Thaw overnight in the fridge and serve.
Recipe FAQs
Yes! High-fat yogurt is very keto friendly. If you’re new to keto, the goal is to eat high fat, moderate protein, and low carb. I share all about the keto diet here! This coconut yogurt has even better fat macros and is lower in carbs than full-fat cow milk dairy yogurt.
Yes! I tested this and it freezes and thaws perfectly. It stays nice and thick. The main reason I love storing the coconut yogurt in half-pint or 4-ounce mason jars is that both of those are freezer friendly. Nice to have in the freezer and on hand at all times, especially since the recipe takes a full 24 hours to make.
Maybe? It definitely tastes like coconut, since it is made with coconut milk. It does get more tang and tastes “yogurty”, so you may like this version of it? My husband Shawn does *not* like coconut milk, and is turned off by it when I use it in soups in place of heavy cream. But! He likes this coconut milk yogurt! So it’s worth a try!
Get an instant pot right now! I have this 6-quart one, which is very affordable and I use it constantly. If only to make bone broth and this coconut yogurt, the instant pot will more than pay for itself! There are other methods out there that you can use to make coconut yogurt on your counter, or in your oven using just the oven light. But those are not nearly as foolproof since they don’t have a steady/exact temperature setting for the full 24 hours this yogurt needs.
Yes! You can use any non-dairy milk of your choice to make dairy-free yogurt or use dairy milk for regular yogurt. You’ll need 3 cups of milk or non-dairy milk for any substitution. You can always try one milk and then a different one for your next batch of yogurt.
Yes! I personally love to leave the yogurt plain, and then add fresh fruit on top. This way my coconut milk yogurt is the most versatile for whatever I need it for. But if you like flavor, I would blend up fresh fruit to add to the yogurt and flavor it. I recommend 1/2 cup of blueberries blended. If you try this let me know in the comments how it turned out!
Yes! All 3 of these ingredients are Whole30 friendly, and so is the yogurt when it’s made with all 3 ingredients. It’s also dairy-free, gluten-free, grain-free, paleo, plant-based, vegetarian, and vegan.
More Keto Recipes


Did you love this recipe? Thank you! Please give this recipe a star rating and leave a review below. I respond to every one! Be sure to follow me on Instagram, Pinterest, TikTok, and Facebook. Tag me if you try a recipe!
Instant Pot Coconut Yogurt (Dairy-Free & Easy!)
Ingredients
- 2 cans (14 ounce) coconut cream, or coconut milk
- 1 tablespoon agar agar flakes, (make sure it's agar agar FLAKES and not agar agar POWDER, as these are different)
- 4 probiotic capsules
Equipment
Instructions
- Set your instant pot to SAUTE. Add in the 2 cans of coconut cream and wait for them to come to a rolling boil uncovered (no need for the lid). This takes about 3-5 minutes.
- Once the coconut cream is boiling, hit CANCEL on your instant pot. Add in the agar agar flakes and whisk vigorously to combine.
- Let the mixture cool to 110ºF using an instant read thermometer. If you don't have an instant read thermometer, you want the mixture warm enough to touch without it burning you. If it is too hot, it will kill the bacteria in the probiotic capsule. I set a timer for 30 minutes, which is how long it usually takes for it to cool enough.
- Once the mixture is cooled to 110ºF, open the 4 probiotic capsules and pour them on the coconut cream mixture in the instant pot. The coconut cream will already be slightly thickened from the agar agar flakes. Whisk again to fully combine the probiotic capsule powder.
- Close your instant pot with its lid, and press the YOGURT button. You may need to press it a few times until it says 24:00, meaning 24 hours. The yogurt is going to take between 18-24 hours. I like to set it for 24 hours so I have a long window to get the coconut yogurt the next day.
- Somewhere between 18-24 hours, your coconut yogurt is done! Open the lid, and transfer the yogurt to jars or air tight containers to cool. The yogurt will still be on the liquidy side. Coconut milk yogurt firms up *significantly* after cooling in the fridge, so don't panic that it's not "yogurt thick" in the warm stage. Includes recipe links, a printable menu + grocery list template! If it tastes like it has that yogurt tang, you've made yogurt! I love these half pint Kerr mason jars or these 4-ounce Ball mason jars. Both are freezer friendly too!
- The coconut yogurt will keep for at least 30 days in the refrigerator, or at least 1 year in the freezer.
- As always, lots of tips, FAQs and substitution info in the Recipe Notes below!
Notes
- No Yogurt Button? Use the Sous Vide function set to 110ºF if you have an Instant Pot Duo Crisp or Pro Crisp.
- Texture Too Runny? Increase the agar agar flakes to 1.5-2 tablespoons next time. For a drinkable yogurt (like kefir), use less.
- Alternative Milks: Coconut is best for flavor and texture, but almond, cashew, or soy milk can work. Note that the flavor and creaminess will vary.
- Flavored Yogurt: Add ½ cup pureed fruit (like berries or mango) after incubation. Sweeten naturally with monkfruit or maple syrup as desired.
- Batch Prep: Double or triple the recipe if you want to stock your fridge or freezer. Great for meal prep!
48 Comments on “Homemade Instant Pot Coconut Yogurt Recipe (Keto)”
Does this work best with 2 cans of coconut cream than say, one of each. Mine is tart, but it’s so thin. It’s more like kefir. I used one can of coconut cream and one of coconut milk.
When I put it in the refrigerator, then pulled it out later, there was a solid layer on top, like what you see when you open a can of coconut milk.
I have been playing with homemade yogurt recipes for a while. I have found the probiotic matters. If you have an old one, or one that needs to be refrigerated it wont work. Letting the coconut milk cool after boiling is necessary for the bacteria to survive! to speed it up sometimes I take the liner out of my instapot and set it out on the stove or an ice pack to cool off. I make this but use beef gelatin.
These are great tips, Kelsey! So honored to have you here and thank you so much for making and rating my recipe!
Hello, I have a bio-culture with 10 billion CFU . Do I put 5x the amount in the recipe as you use 50 billions caps?
Thank you
Nadine
Good question! That’s what I would do. I haven’t tried this, but I’m pretty sure that’s how it should work out. If you try it, let me know how it turns out!
I’m sure this would’ve turned out nicely, however I used agar agar powder unwittingly. I highly recommend a clear note in the recipe about the difference between order and flakes for those of us who have never used this product before.
Mine was a solid, gross rubbery mass. And I’d doubled it, so that was a lot of coconut milk thrown away.
This is a good point. I’m going to adjust the recipe card to make it even more obvious so people are sure not to use agar agar powder. Appreciate the feedback!
First, thanks for this recipe! I am excited about it! But… mine didn’t turn out. :(
I followed instructions to the letter, but it was gritty and clumpy. Maybe I didn’t stir the flakes in enough, but I really thought I did. I have a couple questions as I go for my second attempt.
1. If you want it sweetened (and I do), when do you add the sweetener?
2. If this recipe gets messed up, can you potentially get sick from the failed fermentation process? Meaning, can the probiotics change somehow and make you sick? Just curious about the level of caution needed when working with good microbes.
Really hoping the next batch turns out. 🙏
I’m so sorry it didn’t turn out! I hate when that happens! A few thoughts and answers that I hope are helpful:
1. Are you sure it was agar agar flakes? Not agar agar powder? This recipe is designed to use the flakes. The powder is not a 1:1 ratio replacement for the flakes. Just a simple one that could possibly explain it being gritty!
2. Yes, you can definitely sweeten it! I like to add the sweetener after it’s done, so I can add it gradually until it is the sweetness of my liking. My favorite to use is keto maple flavored syrup, or if you don’t need it to be keto using maple syrup or honey is perfect! Coconut sugar works too but changes the color a tad.
3. No, you can’t have any issues with the fermentation process! The worst that can happen is you kill off the bacteria by having the mixture be too hot. Or it gets too cold. It can’t mutate and the bacteria goes rogue or bad. The coconut milk can definitely spoil if not stored properly after you make the yogurt. And the reason you boil the yogurt first is to make sure you kill off any bacteria that could potentially be present. But no issues with some sort of new bacteria from the probiotics forming and making you sick!
Hope these help!
Didn’t turn out for me. It taste grainy and spoiled. I live at high elevation, and I wonder if I need to adjust for that.
Oh darn! It shouldn’t be grainy. Did the agar agar flakes come to a boil so they could dissolve? It could have been an issue with your canned coconut milk too. I don’t think altitude makes a difference, Sorry it didn’t work out for you!
Hi Natalie, I am hopeful your lovely recipe works for me! I have the Instant Pot Duo Crisp which doesn’t have the yogurt function. After searching around the net, I found that I could use the Sous Vide function. But every recipe was for plain or Greek yogurt and none were for coconut milk yogurt. I will let you know how this turns out tomorrow. But currently it is set on 110 degrees for 10 hours. So I’ve been wondering how this will compare with yours when yours is set for 24 hours!
I’m giving an update. I ended up using the Sous Vide function on my IP at 110 degrees for about 18+ hours. It turned out great! Natalie says that it thickens after refrigeration which is definitely true! Thank you, Natalie for your lovely recipe!
Oh Jill this is such great news! I am SO glad that it turned out! So brilliant to use the Souv Vide function- I bet this will be so helpful to readers who have that function! THANK YOU!
Ooooh! I can’t wait to read how it turned out! Love that you shared this with me! Thank you!
Yogurt was amazing! I topped it with a few blackberries. It was delicious and so easy. Mix and walk away. I added a couple of pack of monkfruit / stevia. Thank you for your inspiration and new recipes for me to expand my palate and keto adventures.
I absolutely love this yogurt! I add a little monk fruit & some mashed raspberries and that is a great keto breakfast! Breakfast is always a challenge for me since I don’t eat eggs but this is perfect!
Oh that sounds like such a lovely breakfast! So glad you like it!
Hi, I made the yogurt and it was technically finished three hours ago. I have not opened the lid yet but It’s been 3 hours since it finished. Did it go bad? Or does it continue to cook? Thank you!
You’re still fine! It would just continue to “cook”, which is really just the bacteria populating. May be slightly tangier, but still totally fine and edible!
I have the small instapot it does have a yogurt button I did hit sauté first and then after cooled for 30 minutes hit yogurt for the 24 hrs. The first time I made it I thought it didn’t work cause it wasn’t thick at all after 20 hrs so I reboiled and tried again lol well that didn’t work at all was way over cooked and brown and separated yuk! But I thought what have I got to loose. So I tried again with a new batch and didn’t realize it would finish while I was at work so I decided to put in jars in the morning before Wk at 15.5 hrs. Well it’s thicker now but gritty after being refrigerated all day. So did I boil it too long for it to be gritty? Followed the directions to a tee. I think. I will try again after I hear back from someone.
Oh darn! Sorry it’s gritty. It shouldn’t be gritty at all, but super smooth! It definitely thickens *significantly* after being refrigerated. It’s still on the liquidy side while still warm.
What coconut milk did you use? I wonder if it’s canned coconut milk specific?
I am going to give it another try tonight. i used the Thai Kitchen coconut cream. I did put the gritty yogurt in a blender with blueberries and ate it anyway. not to good but couldn’t waste it….lol
I’m so sorry it was gritty! How did it turn out the second time?
My yogurt didn’t work! Opened after 18 hours and it looks the same as yesterday. Any ideas of what could have gone wrong? I’m so sad lol Any tips would be greatly appreciated. I love your recipes and use them all the time.
It thickens as it cools! In the fridge! Does it taste like it has that yogurt tang?
It didn’t thicken up and was very separated. Not creamy like your pictures. I’m going to try again. Does it appear separated at first when it’s done cooking?
It worked! I’m so excited that I’m making another batch right now.
I think the problem was I didn’t let it cool long enough before adding in the probiotics. I waited almost an hour for my second batch and it looked much better when I opened it after 19 hours.
Hopeful my third will be just as great. Thanks so much for all your wonderful recipes. Anytime my husband tries a new recipe and loves it he always asks “is it from that lady that I love?” The answer is almost always yes 😂
Aww yay! I am so glad it worked!! It can sometimes separate, as coconut yogurt tends to do when warm or room temperature. (just like it does in the can, separating the water from the fat). If it happens again, don’t throw it out! Give it a stir, pour in a jar, and refrigerate. It thickens a ton once it’s cooled! Also, you are the sweetest!!! Love that you’re here! And that your husband just *knows* :)
I didn’t think it thickened but did after I put it in the refrigerator…. I love this recipe as is. I decided to try adding a little Monkfruit sweetener & cacao powder for a decadent chocolate yogurt! SO GOOD! 😁😁
Yes! It totally thickens in the fridge. Adding monk fruit and cacao is BRILLIANT! Such a yummy, healthy dessert!
Perfect breakfast food with flax, hemp seeds, pumpkin seeds, canned pumpkin- yum! Made a batch last weekend and it was delicious- although I discovered my IP does not have a yogurt button! Found another recipe that said to put lid on and cover pot with heavy towel and let sit overnight or 24 hours…it worked! BTW, your recipe ingredients list says 1 can coconut cream but instructions and video say 2 cans. ;-)
So glad you liked it! What an ingenious workaround the IP button. This is so great for others if they don’t have a yogurt button! And thanks for catching that typo! Fixed it!
My instapot will only go up to 12:00. Gah! I’ve got it on the yogurt setting and I tried pushing the button more than once but the furtherest it would go was 12 hours. Guess I’ll just set it again once it beeps? Has this happened to anyone else?
I think I’ve found the issue. The Instapot I have, when you push the yogurt setting, does all the things. Meaning you don’t have to bring it to temp, cool it etc. once you put the coconut cream and agar flakes in it and press yogurt, it’ll bring it to a boil then cool it THEN prompt you to open and add in the probiotics and stir. Then it ferments until done. I think it’s a total of 18 hours but it’ll only go up to 12 on the machine. It does take longer than 12. Gonna try this tonight and see if it works!
Oh how interesting! I didn’t know that was a built-in setting in instant pot yogurt functions. I’m going to add this to the recipe notes so it’s helpful for other users. Thanks for sharing!
Oh how strange! Yogurt is always at least 18 hours. Darn, what a pain.
Good thinking, setting it again after 12:00 hours. Hopefully it’s not at an inconvenient time in the middle of the night!
Will agar agar powder work??
Melissa, I googled it, and discovered that 1T agar agar flakes = 1 tspn agar agar powder. Do as I say, not as I did! I used 1 T of the powder. It was not pretty!!! Good luck!
Again, thank you Kate! I hope you get that instant pot back soon so I can hear about your next attempt! I know it’s going work!
I will not accept defeat! It’s been a rollercoaster weekend as I try and master the yogurt game! First came the scavenger hunt, as I scoured the eastern MA area to gather the ingredients locally! Schooled many grocery store managers on what agar agar flakes were! Finally was directed to an Asian market where I found agar agar powder. Hopefully that won’t make a difference. Next I learned, the hard way, that coconut cream and cream of coconut are NOT THE SAME THING! Holy cow, was that sweet! Tossed.that batch and located more probiotic capsules. Does it matter that my second batch is only 30 billion live cultures? Second batch looked great! Checked it before bed last night and everything seemed right, 6 hours down, 12 to go! This morning, SOMEONE HAD TURNED OFF THE INSTANT POT! I opened it, hoping it would still be warm, but it was ice cold, gelatinous and no yogurt tang. Today, we try again. This time I’m hiding the instant pot. That red light is too tempting to some trigger happy culprit in this house!! I can’t wait to eat my homemade yogurt! Thank you for another great recipe, Natalie, even if I am directions challenged!! Your videos are the key to reaching success!
HAHAHA! O.M.G. Kate. I love you. Your determination is absolutely amazing! Please tell me your next batch turned out well!?
I have agar agar powder on hand… not flakes. Would that work as well?
Hi Lesley! Did you try using the agar agar powder? I did, three times, and they were all flops! But I just googled and discovered that 1 T agar agar flakes = 1 tspn agar agar powder! I just returned the instant pot I borrowed, but I’m going to give it one more shot tomorrow! I hope your yogurt turned out!
Kate! This is so helpful! I had never even heard of agar agar powder. Definitely testing this out! Thank you!
I just realized I made this mistake. My yogurt came out way too thick. Apparently I bought the powder. I’ll see how it cools and then try it with 1 teaspoon next time.
Yes, sorry, the agar agar powder is different than agar agar flakes! I’ve made a note of this in the recipe notes!
Ooooh, good question! I didn’t even know there was agar agar powder. I haven’t tried. I know the flakes work for sure! I got them on Amazon. I have the exact one I used linked in the post.